Learn How To Cook Brown Basmati Rice In A Uniquely Indian Style

Rice is the classical carbohydrate you often see on your plate. Whether it’s partnered with steak, egg, or steamed vegetables, no other starchy food can beat rice! What’s even more fantastic about rice is that it can be served in many different varieties.

Here, we will be talking about a special version that came from the colorful culture of Asia – Basmati Rice.

More…

What Is Basmati Rice?

It is considered to be one of the best varieties or rice. Basmati comes from the Sanskrit word “vasmati”, which means aromatic. This long-grained, fragrant, and nutty-flavored rice is cultivated in the beautiful fields of India and Pakistan. It is grown through traditional methods, which produce naturally fresh grains.

There are contrasting ideas about how basmati rice should be cooked, including whether it should be soaked first or not, boiled or not, and how high the water level should be. But, having cooked rice for many years, I think the ratio-based boiling method works the best.

Five Tips On How To Cook Basmati Rice

  1. Look for the best quality Pakistani or Indian basmati. Find ones that are locally available and affordable.
  2. Rinse the rice thoroughly for a few minutes; this helps to remove the stickiness of the starch.
  3. You can try adding salt in the cooking pot before pouring some water, as this allows the rice grains to absorb the salt well. Never add salt to cooked rice; it will make it taste extremely salty.
  4. An aluminum foil or a tight-fitting lid is ideal way of creating a strong seal. This will stop the steam from escaping. If you cover the pot with a tight seal, it produces long soft grains.
  5. You can add a few drops of plain vinegar, which separates the grains well.

How To Cook Basmati Rice?

To get started, here are the things you need:

This recipe yields 4 cups of cooked Basmati rice, quite enough for a family of four! If you wish, you can add or subtract the amount of ingredients according to the number of the people you will serve.

To get started, here are the things you need:

  • 2 1/2 cups Basmati rice.
  • 2 1/2 cups boiling water.
  • Pinch of salt to taste; the amount depends on your taste.
  • Measuring spoons, cups, strainer, bowl, and sauce pot with lid

What to do:

  • First of all, wash the rice under cold running water then rinse it well by using a strainer. If you prefer to soak it, you can place the rice in a bowl of cold water and let it soak for an hour. This helps to make your rice softer. Or you can skip this step, especially if don’t have enough preparation time.
  • Secondly, transfer your newly rinsed rice to a sauce pot with tight lid. If you have tried the soaking method, make sure you drain the rice well and transfer it into a saucepan while adding a pinch of salt.
  • Meanwhile, boil 3 cups of water in a kettle or another pot and pour onto the rice. Cook and cover with the lid or tight foil. Set to medium-high heat. Once the water is steaming and boiling, use aluminum foil again to cover the pot and crimp the edges around the pan. Then, seal it with a lid on top, as this will to prevent the steam from escaping. Change to low-high heat and let it cook. After 15 minutes, remove the pot from the heat.
  • You can now uncover the pot and fluff with a fork.
  • Serve while hot!

What To Serve With Basmati Rice?

Basmati rice tastes better when partnered with an Indian dish too like Masala Lamb Meatballs!

1. Masala Lamb Meatballs

Meatballs are the life and soul of the party! Whether you are a kid or kid at heart, you will absolutely love making this recipe with our Basmati rice.

Yield: 20 meatballs.

  • 1 pound ground lamb.
  • 1 pound lean ground beef.
  • 1 onion, finely grated.
  • 1/2 ginger root, peeled and finely grated.
  • 3 garlic cloves, crushed.
  • 2 teaspoons salt.
  • 1/2 teaspoon black pepper, freshly ground.
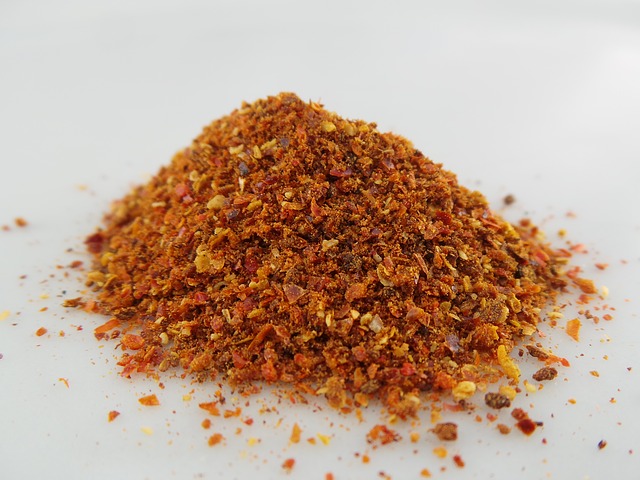
  • 1/2 teaspoon chili powder.
  • 1 tablespoon garam masala.
  • 1 tablespoon cilantro, finely chopped.
  • 2 tablespoon almonds, ground.
  • 1 egg, beaten.
  • 1/4 cup flour.

Instructions:

  1. Combine the beef and lamb well, and then mix the remaining ingredients together, before adding the meat mixture.
  2. Preheat the oven at 450°F.
  3. Mold the mixture into walnut-sized meatballs.
  4. Roast the meatballs until they are pink in the middle.
  5. Serve with Basmati rice.

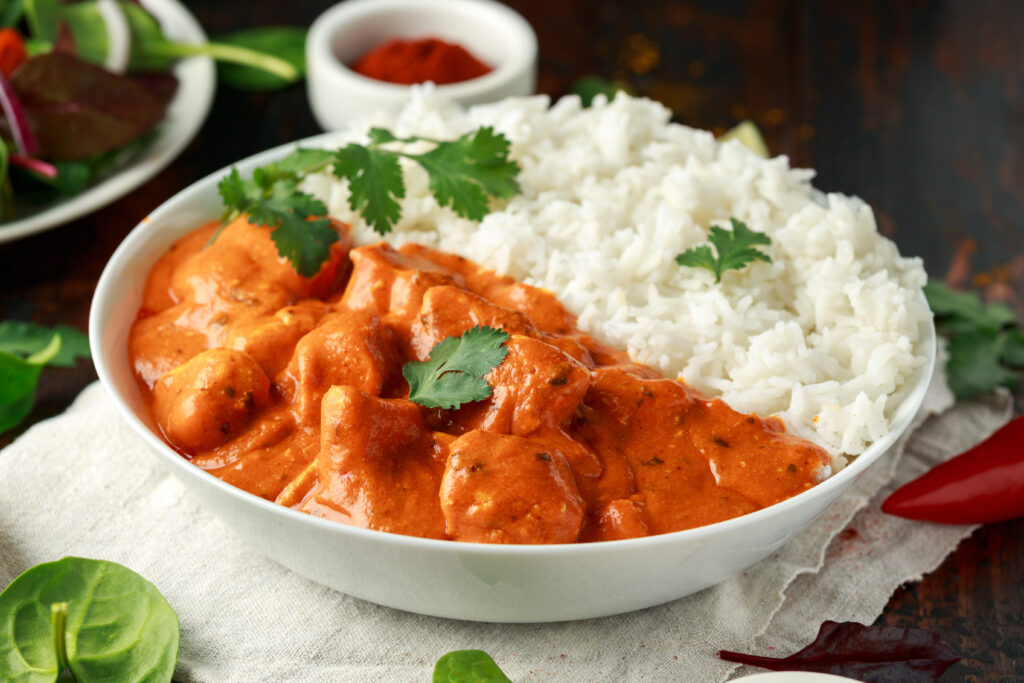
2. Kerala Chicken Curry

Taste the creaminess of the coconut mixed in with the juiciness of the chicken meat.

Yield: 3 servings.

  • 3 shallots, peeled and sliced in half.
  • 1/2 cup unsweetened coconut, grated.
  • 2 dried red chilies.
  • 2 whole cloves.
  • 1 tsp. black peppercorns.
  • ½-inch cinnamon stick.
  • 1 1/2 green cardamom pods.
  • 1 tsp. fennel seeds.
  • 1 tsp. coriander seeds.
  • 1/2 tsp. cumin seeds.
  • 1/2 tsp. brown mustard seeds.
  • 1/2 tsp. turmeric powder.
  • 2 lb boneless skinless chicken thighs, cut into match-sized pieces.
  • 1 yellow onions, sliced.
  • 1/2 tbsp. vegetable/coconut oil.
  • ½-inch ginger, peeled and minced.
  • 1 tomato, sliced.
  • 1 garlic clove, minced.
  • 1 1/2 tsp. salt.
  • 1/2 tbsp. vinegar.

Instructions:

  1. If you are using an electric pressure cooker, set the heat to its brown setting.
    If you are using a stovetop pressure cooker, adjust the pot over a medium heat.
  2. Cook the shallots and red chilies together until black spots appear. Remove and set aside.
  3. Add the coconut and whole spices to the pressure cooker. Cook and stir for about 1 minute or until the coconut turns light brown.
  4. Incorporate the turmeric and stir thoroughly; then transfer the coconut and spices to the food processor bowl.
  5. Mix until smooth. You can add 4 tablespoons of water to create a creamy paste. Set aside.
  1. Pour oil into the hot pressure cooker and incorporate the ginger, garlic, and onions.
  2. Sauté until the onions become soft and brown. Add the coconut spice paste mixture.
  3. Fry and add the tomatoes. Then add the chicken, salt, and vinegar. Combine well.
  4. Cover the pressure cooker and cook under high pressure for 10 minutes.
  5. Check if the chicken is already tender.
  6. Serve with Basmati rice.

Add some fine unique Asian taste to your table by serving the family with Basmati rice! You’ll never run out of ideas on different ways to cook this rice.

Feel free to share what you think, as well as your cooking experiences, by commenting below. Happy rice cooking!

Spicy Peanut Butter: How To Make It Taste Creamy And Hot

There is nothing more boring than eating food that has the same flavor almost every day. Peanut butter is a versatile delicacy. You can use it as a dessert, spread, sauce or blend it with your favorite dishes. How frequently do you use peanut butter every week?

Are you tired of it and desperately looking for something new to spice up your snacks? Let’s give it a twist by making it fiery hot as well as creamy sweet. It’s going to have a real kick to it!

More…

Spicy Peanut Butter

How To Make Spicy Peanut Butter

Peanut butter is a food paste or spread that’s made out of ground roasted peanuts, mixed with salt and sweeteners. You can make it in a way that’s completely different to kind sold in supermarkets. It’s awesomely unique!

Let’s make our own spicy peanut butter that’s perfect and satisfying!

What You Will Need

  • 1/2 kilogram of salted, well-roasted peanuts.
  • 4 tablespoon of peanut oil (or any oil that you have available).
  • A teaspoon of smoked paprika.
  • ½ a teaspoon Kashmiri chili (which you can find in any Indian grocers).
  • Food processor, grinder or chopper.
  • Bowl.
  • Spoon or spatula.
  • Container (glass or plastic with a cover).

Here Are Some Easy Steps To Guide You

I make this peanut butter for grown-ups only. I don’t know how many kids can take the spicy taste, but I wouldn’t recommend it.

1. We’re going to make two batches of ground peanut butter. So split your roasted peanuts into two before loading them into the food processor.

2. Pour the first half of your roasted peanuts in and blitz them long enough until you reach the desired fineness.

3. Tip the ground peanuts and pour them into a bowl.

4. Get the other half of the roasted peanuts and pour them into the food processor with the oil, paprika, and chili. Pulse for 4-5 minutes until they reach the desired smoothness.

5. Add your freshly ground peanut butter into the crunchy peanuts in the bowl. Use your spatula to get it all out from the processor. Mix it well and pour it into your prepared glass or plastic container. Seal it tight and store in your pantry.

Use it when you need it. Enjoy!

If you want your peanuts to be roasted a little bit darker, you can roast them again yourself. Heat your oven to around 170 degrees C and bake them. Check them out every 10 minutes and shake. See if they are as dark as you want them to be.

You’re free to make your own spicy version. There is no limit to how creative you can be. Here is a video on how to make spicy peanut butter. Enjoy watching it!

Now that we’ve made our spicy peanut butter, let’s make use of it in the right away. Are you ready to make spicy peanut butter sauce?

How To Make Spicy Peanut Butter Sauce

Peanut butter sauce is very useful as you can put in a salad or any other dish, which will spice up your cooking adventure.

What You Will Need

  • ½ a cup of your homemade spicy peanut butter.
  • ½ cup of your favorite soy sauce.
  • 4 cloves of garlic, chopped into bits.
  • ¼ of a cup sweetener, preferably honey.
  • 2 tbsps. of wine vinegar (I’m using rice wine).
  • 2 tbsps. of any kind of oil (I’m using sesame).
  • 2 tbsps. of Asian hot chili sauce.
  • 1 tbsp. of freshly sliced ginger.
  • ¼ tsp. of freshly ground red pepper.
  • ½ of cold water.
  • Food processor or grinder.
  • Bowl.
  • Spatula for mixing and scraping.
  • Container for storage.

How To Make It?

Put all the ingredients into the food processor and pulse it for a few seconds or until it’s well blended. See if the sauce is the right consistency. If not, process it again.

Store it in your prepared container. It’s now ready for use!

Some Tips You Can Use

Did you realize this can be made into a sauce in just 3 simple steps? Dump the ingredients in the processor, pulse, and then store. Here are some other useful tips for you:

  • You can make your sauce three days in advance and then put it in a bowl, cover, and store in the fridge. Let it stay at room temperature first, before using.
  • It’s best to use fresh peanuts and roast them yourself to get the exact roasting that you like. Fresh peanuts are much sweeter than those in the supermarket.
  • Don’t limit yourself by just using these recipes – make your own ones by picking, mixing and blending!

Here is a video that shows you how to use spice peanut butter sauce in a sweet potato noodle bowl recipe. Sadly, a ready-made spicy peanut butter was used, but we can always use our homemade version. Look how tasty this recipe can be!

Spicy peanut butter is so versatile, there are tons of recipes out there waiting for you to make. You can use it as a bread spread, fruit dip, spicy appetizer and spicy dessert, as well as a sauce.

What’s your style of spicy peanut butter? You can use different kinds of chili whole or ground, paprika, or hot sauces. In fact, anything that will make your mix really hot!

I wonder how spicy your version is? Please share it with us. If you have found our article fun today, just click like and share it. This is a dare – so the heat is on!

How To Make Badam Milk? I Have A Few Steps To Share!

Does this sound new to you? Good, as it never hurts to learn new things! This time, let’s focus on badam milk.

Since you are curious, let’s find out what it is made of and discover its history. After this, we will learn how to make badam milk in a few simple steps.

Are you all set?

More…

How To Make Badam Milk

What Is Badam Milk?

It first became famous in Pakistan and is now known worldwide. If, like me, this is the first time you’ve heard of this kind of milk, then maybe we’re so not up to date!

This almond milk is mildly flavored with cardamom and nuts, and is chilled before serving. It is drunk as a beverage or a cool drink. Some call it badam pal, and it was also called amygdalate in the past.

Do you know that this milk is very popular in India, as well as Pakistan? The Indians have made several versions of it, like the bestselling drinks listed below:

  • Keshariya Lassi – This is badam milk blended with yogurt.
  • Kesariya Thandai – This is an equal blend of almonds and saffron.
  • Brahmi Badam – Made of high-quality almonds and herbs.

These refreshing, Indian-inspired drinks are not only flavorsome, but also healthy and nutritious. The nut mix really adds flavor, aroma and nutritional value. Sold in the streets, fast food places or any restaurant, this cold badam drink will keep you cool in the hot summer!

In winter, you can also serve badam milk as a hot drink during those cold windy nights!

How To Make Badam Milk

Now you know what badam milk is, you will be excited to make it. This milk can be served hot or cold and is a great substitute if you are looking for a healthy diet.

1. What Do You Need For This Tutorial?

  • Ingredients.
  • Nut grinder or food processor.
  • Glass.

Badam Milk Recipe

Ingredients:

  • 3 cups of cool almond milk (you can make one warm as well).
  • 2 tsp. sugar.
  • 2-3 tsp. cardamom powder.
  • 2 tbsp. kewra essence (this is optional, but you can find it in any Indian store).
  • 2 tsp rose water.
  • Saffron strands for garnishing (optional)

Instructions:

Removing the skin of the almonds

  1. Prepare hot water and soak the almonds in it for a few minutes. This makes the skin soft and, therefore, easier to take off.
    Some people do not like to take off the skin, as it is full of nutrients, and so they go straight to grinding the almonds with the skin on. For me, I like the almonds without their skin.
  2. After soaking the almonds for a few minutes, push them down with your fingers and the skin will slide off without any difficulty. Now the almonds are ready for grinding.
  • Take note:
    A much quicker way to remove the skin is to boil the almonds for 5-10 minutes. When the skin appears wrinkled, take the nuts out, wash them in cold water and take off the skin in the same way as when you soaked them.

2. Grinding the nuts

  1. Prepare your food processor and grind the nuts (almonds and pistachios). Some prefer to grind them manually.
  2. While you are in the process of grinding, pour a little bit of milk, just to make it sticky.
  3. Stop grinding when you see that the mixed nuts look like a smooth paste.

3. Add the ground nuts (paste form) and the sugar, milk, rose water, cardamom powder, and the kewra essence into the food processor. Blend them all well.

Take note that you can let the food processor do the grinding as well. It will be a lot fast and easier.

4. Pour it into a glass and serve!

Pour it into a glass and serve!

It is best to chill the milk before serving, especially if you have visitors coming over. If you want to drink right away and prefer it cold, you can drop a few ice cubes in it. Or you can also serve the milk warm if you like

To serve it warm, you just need a little tweak in the procedure. Instead of mixing all of the ingredients in the food processor, you need to:

  • Boil the milk in the pot.
  • Add all the ingredients while the milk is boiling and mix for a few minutes.
  • Turn off the heat.
  • Pour it into a glass, garnish with saffron and then serve!

You can also add some ground pistachio on top, along with the saffron. It will look good and also add some color.

Here is a video about making badam milk!

Tips On Making Badam Milk

  • You can prepare ahead a powder for the pistachio and almond mix and store it in your freezer until you want to make the badam milk.
  • You can store it in portions using boxes or freezer bags.
  • Make sure you don’t make too much or it will spoil.
  • You can take out the coarse granules of the nuts when serving it to children, to make it a smooth, cool drink.
  • You can skip the additional sweeteners and garnishes. Children do not need more sugar in their diet and they may not like the saffron strands.
  • This badam milk is a good substitute for cow’s milk.
  • For a much healthier recipe, you can use honey as a substitute for the sugar.
  • You can always pair your almond nuts with your favorite nuts, like cashews.

Now you know how to make badam milk! It is a good addition to the list of healthy drinks you can give to your family and friends. Badam milk is rich in dietary fiber, vitamins, minerals, and protein. If you like, you could even try to sell it and make a living out of the drink.

If you enjoyed this article, hit like and share it with your family and friends!

Curry Paste Vs. Curry Powder! Which Is The Best Choice For You?

Curry is India’s most popular contribution to the culinary world. There are so many variations, from chicken to goat. But there is one key ingredient that is always present in this dish, and that is curry powder or paste.

A lot of good cooks automatically assume a lot of things about curry paste and powder that are untrue. Some claim that one is better than the other and this is simply misleading to curry lovers everywhere.

Both have their advantages and disadvantages, and if you really want a great curry experience then it is best to know when to use which one.

More…

Curry Paste vs. Curry Powder

What Is Curry Powder?

The earliest accounts of curry powder date back to a newspaper advertisement in 1784. This tells a fantastic tale of the spice being brought home from a dangerous voyage from the East Indies. The advertisement also claims that curry powder has some health benefits, like better digestion, improved circulation, a vigorous mind and strong libido.

Going back to more factual data, curry powder is a blend of spices that normally contains coriander, turmeric, and red peppers.

While curry powder is readily available in packs at the supermarket, keep in mind that there is no actual curry powder in India. This means that most curry dishes in India contain a mixture of spices that normally contains coriander, turmeric, and red peppers. 

This means that if you are considering making a curry, then it is a good idea to make your own curry powder blend. That way you can adjust the spices according to your taste, which is pretty much how they do it in Indian kitchens.

However, for those who like a bit of convenience, there are dozens of curry powders that are known to be of good However, for those who like a bit of convenience, there are dozens of curry powders that are known to be of good quality. One curry blend that I always recommend is the Frontier Coop Curry Powder, which has a fantastic, rich blend. You can check them out at their online store.

What Is Curry Paste?

Curry paste is a blend of spices mixed with wet ingredients. The wet ingredients added to the spice blend are typically oil mixed with some garlic and ginger. Curry paste is typically much stronger than curry powder, and so it is better for other cooking applications.

A popular curry paste variation is called Thai curry paste. This is normally classified into green, yellow, and red curry paste. All three have different ingredients and are used for different dishes.

Most Asian supermarkets will carry a packet of Thai curry paste as it is a very popular ingredient there. For those looking for a recommendation, you won’t go wrong with the Mae Anong Brand. This maintains an authentic and distinctive curry flavor without being too overpowering. You can check it out at Amazon.

Which Is Better: Curry Powder Or Curry Paste?

This particular question cannot be answered with a simple yes or no.

  • The first question to ask yourself is how much experience have you had of eating curry?

If the answer is not that much, then I would suggest using curry powder first, as it is less potent than curry paste. This will allow you to acquaint yourself with curry’s distinctive and powerful flavors as not all people can handle a strong curry when their first try it.

On the other hand, seasoned curry eaters will probably enjoy the more robust flavors of curry paste, which is hotter and overwhelms the senses with flavor. I have some friends who swear by eating a fiery bowl of coconut curry soup and say that it is one of the best dishes that they have tasted.

  • The second question is what type of food are you cooking?

Thai Pumpkin Soup (Via FoodieCrush)

If you are making soup, then it might be a good idea to use some curry paste. This can liven up a boring soup paste and turn it into something astounding with its more potent flavor. So, if you are planning to whip up something quick, then go ahead and use curry paste.

But for stews and dishes in the same category, nothing beats using curry powder. Slow cooker stews, which can take hours to make, will benefit from the curry powder’s milder flavors. Those milder flavors will eventually gradually seep into the stew or meat and produce really vibrant and amazing flavors.

Conclusion

Curry is one of those dishes that is definitely a must eat for real foodies. For amateur cooks and chefs, learning to use curry paste and curry powder can boost their culinary knowledge and ability to produce this kind of dish. The versatility of curry is an amazing treat for those who can properly use its main ingredient.

How To Make A Sarku Japan Chicken Teriyaki? – GimmeTasty.com

I’ve always loved trying new things, especially from another culture. When I’ve had enough of Western food selections, it is fun experimenting with Asian food, like Japanese, Korean, Indian and Chinese.

Apart from their popular raw foods, Japanese cuisine is uniquely sweet and sumptuous. Whenever I eat at a Japanese restaurant, my personal pick is the Sarku Japan Chicken Teriyaki.

So, I decided to cut out the hassle of going out and to try to cook it at home instead (I also have those bad weather lazy days, you know). And besides, it gives me full control over the amount of ingredients that I use.

Feel free to change any amount of the ingredients that you desire, which will depend on the number of people you are going to serve!

Before you start, here are the things you need to prepare:

1/2 lb. raw boneless, skinless, chicken thighs.

(Note: I prefer the thighs because I believe they have more meat than legs or wings).

  • 1 cup of chicken broth.
  • 1/2 tbsp. of dark/gluten-free soy sauce.
  • 1 garlic clove.
  • 1 1/2 tbsp. of water.
  • 2 slices of ginger.
  • 1/2 tbsp. of tapioca starch.
  • 2 tbsp. of brown sugar.
    (Note: This provides a contrasting taste to the soy sauce, which is why chicken teriyaki is sweet and salty at the same time).
  • 1/3 tsp. of baking soda.
    (Note: It may sound weird, but this helps to tenderize the meat more! Don’t worry, it won’t affect the taste at all).
  • 1/2 tbsp. Shaoxing wine.
    (Note: Shaoxing is made from China. It may sound like an ingredient that’s as rare as a diamond, but you can actually buy it at any Asian market store near you).
  • 1 tbsp. of soy sauce.
  • 1 tbsp. of olive oil.
  • 1/4 tbsp. of tapioca starch.

So let’s get our hands working!

Preparation

  1. First of all, let the boneless, skinless chicken thighs dry. If you want other chicken parts, it’s up to you. I prefer the thighs because they are more juicier and meatier.
  2. Next, cut them into smaller pieces that are half the size of a matchbox (or about 1-inch by 1-inch). The smaller the pieces are, the shorter cooking time.
  3. Mix the sliced chicken, baking soda, Shaoxing wine, soy sauce, and tapioca starch in a large bowl.
  4. Combine them well together and then leave them in the fridge for at least 24- 48 hours. Yes, patience is a virtue. You need to soak the chicken this long, so they’ll end up being tender and tasty, just as you like!
  1. Meanwhile, in a separate sauce pot, pour the reduced chicken broth, chopped garlic cloves, and ginger. Heat until boiling, then let it simmer for at least 15 minutes.
  2. Incorporate brown sugar and dark soy sauce. It’s up to you on how much amount you add.
  3. In a separate small bowl, mix tapioca starch with cold water. Add the cornstarch and water mixture to the sauce pot where the broth was mixed. Mix them well until they thicken. You can prepare this ahead of time if you want.

Mixing and Cooking

  1. Let the chicken cool to room temperature for about 30 minutes before cooking.
  2. Set a non-stick pan on high heat, then add a tablespoon of olive oil. Make sure that the olive oil is generously spread all over the pan before adding the chicken.
  3. Don’t fill the pot too full of chicken pieces. All of them need to get a nice searing. Continue cooking until the chicken pieces turn white at the edges. Press the chicken bits from time to time using a spatula, which will give them a further sear.
  4. Flip the chicken pieces over once they have been seared. How long this takes depends on if you like your chicken to be crispy or not. You can always adjust according to your preference. It took me 3 minutes per side. Not bad, isn’t it? 
  5. Once it’s cooked, turn the heat off. Get the sauce mixture you prepared a while ago and mix it with the chicken.
  6. Serve while hot! If you want, you can add some mixed fried vegetables as a side dish.

Voila! Our homemade Sarku Japan Chicken Teriyaki recipe! You don’t have to go all the way to your nearest Japanese restaurant or a thousand miles around the globe just to experience Japan. Because you can now get to experience a Japanese kind of pleasure for your tastebuds in your own home. Arigato! Enjoy cooking!

Harissa Substitute: The Best 6 Options

Harissa is undeniably an exotic ingredient. Just like smoked paprika or chili paste, it is not something that is either staple or ordinary. Therefore, finding the best harissa substitute can be difficult, especially if you are not aware of how this ingredient works.

The very first time I came across harissa paste was when a friend of mine introduced me to her roasted chicken recipe. She had included harissa and peas in the dish, making it more pleasurable to the tongue. After that, I made sure this ingredient was present in my spice rack.

But just as with other condiments and spices, harissa is not always available. After all, it is a regional ingredient that is only common in the Middle East and North Africa. Outside of these places, it is a rare find.

Fortunately, there is a way out of this problem. As long as you know all the potential alternatives to this spice, your life in the kitchen will be less stressful. Before revealing all of these recommended substitutes to you, I will, first of all, discuss the overall nature of harissa.

More…

What Is Harissa?

harissa paste original

It is essential that you know the fundamentals of harissa; otherwise, you will never know how to use it properly. As I said earlier, harissa is a traditional ingredient in North Africa and the Middle East. This spice gives their dishes an authentic traditional feel. One good example of this is kebabs that taste so much better when they’re sprinkled with harissa. The spice provides an authentic, idyllic flavor with a spicy, chili-flavored tang.

Harissa is a paste made from different kinds of spices and herbs, including garlic, caraway seeds, coriander, and red chilies. Some manufacturers have modified the way they make harissa, but the flavor of this ingredient generally remains the same.

Many people are searching for harissa because of its capacity to enliven particular dishes. If you haven’t found any yet, don’t worry, there is still hope as there are a number of harissa alternatives for you to try. 

Best Harissa Substitutes

Cooking can be bothersome, especially if you have run out of a particular ingredient and it is nowhere to be found in your kitchen or nearby grocery stores. This situation is inevitable sometimes, but it’s not impossible to overcome this predicament if you are both quick-witted and resourceful.

I have listed all of the possible ingredients that can recreate the same taste as harissa. Here they are:

Harissa Powder or Harissa Paste

harissa powder or harissa paste

Harissa comes in two different forms: powder and paste. Both harissa powder and harissa paste are interchangeable. So, if there is no harissa powder available, you can just replace it with harissa paste (if it is available), and vice versa.

These two forms have the same flavor and aroma, but their consistency is dissimilar, especially the texture. This is because the paste is not as loose as the powder. Harissa paste can be created with ingredients that are similar to harissa powder, but the paste can contain olive oil or water.

As I stated earlier, the ingredients of commercial harissa products are varied. Therefore, make sure that the blends that you choose are similar in composition to the harissa that you want.

Also, be aware of what kind of harissa you need for the recipe you are making. For example, powder harissa is not a good choice for dishes that requires a thick texture, and harissa paste is not the ideal option if you are making dry rubs for chicken and other types of barbecues. But regardless of this fact, you can interchange these two harissa products by using a 1:1 ratio.

Chili Powder as Harissa Substitute

Harissa Substitute - Chili Powder

This is another exceptional alternative to harissa. Despite being made out of a special blend, chili powder is still pretty accessible in most markets around the world.

Chili powder is made from a combination of spices that are commonly present in Latin American recipes. From this fact, you can deduce that most chili powder today is made out of cumin and dried chilies. These spices are also present in some harissa variants. As a result, their flavor palettes are not that different.

You can always use chili powder if you want your recipe to give your food a slightly moderate heat. Harissa powder tends to be hotter than ordinary chili powder, so add red pepper flakes or cayenne to the chili powder if you want your food to have an extra kick. These ingredients can emulate the strong spicy flavor of harissa.

If a particular recipe requires you to use one teaspoon of harissa, you can just replace it with one teaspoon of chili powder, but you always have the option to lower or increase the amount of chili powder, depending on your preference.

Berbere Spice as Harissa Substitute

Berbere Spice as Harissa Substitute

Berbere spice has the same origins as harissa and has a similar tang, which makes it a compatible alternative. The spice originally started in the Horn of Africa. There is a misconception that berbere was first used in the northern regions of Africa, but this is completely untrue. The reason for this confusion is due to cumin and chili peppers being pretty common in North Africa.

Berbere has now branched out and is already been modified in different regions. As a result, it is a specialty choice, especially because of its flavor profile. Despite this, you can still liberally add Berbere spice to any recipe that needs harissa. Use a 1:1 ratio again. 

Sriracha as Harissa Substitute

noodles with sriracha - used as harissa paste substitute

The consistency of harissa and Sriracha are worlds apart, but their flavors are undeniably a match that’s made in heaven. Sriracha is a good alternative to harissa for dishes that require a spicy punch, as the spiciness is not that overwhelming. You will find it being used in Tunisian recipes.

Sriracha also has a subtle garlic tang, which will remind you of the earthy flavor of harissa. To further improve the flavor, just add cumin, caraway, and coriander.

I find that adding these extra spices is a necessity, for Sriracha seems thin if you use it on its own. With these additives included, however, you can achieve the same consistency as harissa paste. Alternatively, you could use hot paprika to replace the three spices.

Red Pepper Flakes as Harissa Substitute

Red Pepper Flakes as Harissa Substitute

If you cannot find any of these alternatives, then you’ll have no other choice but to use red pepper flakes. Harissa and red pepper flakes are not at all similar, but they can both add heat to your food. If you only need your food to be spicy, then you’ll find that red pepper flakes are fine. But you cannot replicate the subtle, yet complex flavor of harissa with red pepper flakes alone.

If you want to thicken your recipe, you should mix red pepper flakes with Sriracha or sambal oelek, which will improve the flavor of the dish without altering its texture. 

Tandoori Masala as Harissa Substitute

Tandoori Masala as Harissa Substitute

There are other ingredients that you can try as an alternative to harissa. One of them is Tandoori masala, which is the cousin of garam masala.

Tandoori is a native Indian spice blend that is commonly used in the making of Tandoori chicken. It is primarily based on red pepper, garlic, and coriander, which are all present in the typical harissa blend. The problem with this ingredient is that it is difficult to acquire.

Conclusion

Finding the best harissa substitute is by no means a walk in the park. Sometimes, it can get tedious, as this particular ingredient has a unique taste and texture. In fact, you may have already noticed that there are not many potential alternatives to harissa. This just goes to show that it’s not an easy job to replicate this spice blend.

Fortunately, the ingredients I have listed here are all fully capable of being a harissa substitute. They work well in different recipes and most of them are not that difficult to acquire.

Was this article helpful? If you have any other recommendations or questions, feel free to ask them to me in the comments section below!

The Best Ways To Make Delightful Tutti Frutti Cakes

If you love cakes, then you might be familiar with tutti frutti cake because it’s very popular. But what is it? Well, it is an Indian dessert that is simple to make, just follow the baking techniques. This is a dessert that is loved by most kids and even grown-ups, as it is very yummy and soft. It can be enjoyed as a snack with your evening tea or a special dessert for a party or any other occasion.

If you want to make a cake with eggs then a tutti frutti cake is ideal. For additional flavor, you can add an orange or pineapple juice. This cake is delicious and colourful, and it doesn’t need any frosting. Continue reading this article for some recipes.

More…

Tutti Frutti Cake

There are two ways to make tutti frutti cake – by using an oven or a pressure cooker. Let’s learn them both, one by one.

How To Make Tutti Frutti Cake With Eggs And Orange Juice In An Oven

This recipe will include eggs and orange juice and will be done in an oven.

Ingredients

  • One cup of all-purpose flour or Maida.
  • A half teaspoonful of baking soda and baking powder.
  • 100 grams of butter.
  • A half cup of sugar and one and a half tablespoon of granulated white sugar.
  • Two eggs.
  • ¼ cup of tutti frutti.
  • 3 tablespoons of orange juice.
  • A teaspoonful of orange or vanilla essence.

Preparation

First of all, preheat your oven to 180 degree Celsius for 15 minutes. Bring all the ingredients to room temperature. Then, sieve the Maida, baking soda and baking powder together twice. Set them aside.

Powder the sugar, then mix or dust the tutti frutti with a little Maida, so that it doesn’t settle at the bottom of your cake.

Grease your baking tray with a bit of butter and dust it with Maida. If you are planning to make cupcakes, grease and dust the moulds of the cupcakes or line them with cupcake liners.

Method

Here are the step-by-step instructions:

  • Beat the sugar and the butter until they become creamy. Then, add the eggs and beat properly.
  • Add half of the Maida and gently fold. Add the orange juice, the rest of the maida, the essence and the tutti frutti that’s been dusted with flour. Gently fold it until everything is well-combined. The cake batter is now ready.
  • Pour this batter in the cupcake moulds or baking tray, and gently trap the tray to evenly spread the batter.
  • Finally, bake in a preheated oven for at least 25 to 30 minutes or until the inserted toothpick in the center comes out cleanly.

Simply follow these methods and you will have delicious tutti frutti cakes or cupcakes.

  • If you want a pineapple flavored cake then add three tablespoons of pineapple juice, rather than the orange juice, and a teaspoonful of vanilla or pineapple essence. Tropicana pineapple juice can also be used.

Here’s a video of how to make tutti frutti cake:

How To Make Tutti Frutti Cake In A Pressure Cooker

Have you tried making tutti frutti cake in a pressure cooker? You use the same ingredients as you do in an oven. This is great for people do not have an oven at home, as they can use the pressure cooker instead.

(Via Cookery Atlas)

For a tutti frutti cake recipe in a pressure cooker, consider the following:

Ingredients

  • Two cups of refined flour or Maida.
  • ¾ of a cup of powdered sugar.
  • ½ teaspoon of baking powder and baking soda.
  • ¾ of a cup of milk.
  • A half cup of ghee.
  • A cup of condensed milk.

Instructions

  • Sieve the baking soda, baking powder and Maida in a bowl and mix all the ingredients. Repeat this at least two or three times as it adds a little air into the flour.
  • Properly mix the ghee whisk and powdered sugar until it’s smooth.
  • Put in the condensed milk and mix it well, along with the sugar and ghee mix.
  • Add the flour into the mixture, then whisk the batter in one direction. Add the milk too and mix it until it becomes fluffy and there are no lumps.
  • Grease a cake tin with ghee, then dust it in the corners with a thin layer of flour. Now, pour the prepared cake batter into the greased tin and set aside.
  • Remove the rubber or gasket from the lid of the pressure cooker so it will not whistle. Put the thick, small steel plate right at the bottom of the pressure cooker. Spread a cup of salt into the base to prevent the base of the dish from coming into contact with the bottom and maintain the temperature inside the pressure cooker. Now, put the pressure cooker on a high flame for 2 to 3 minutes to preheat it.
  • Place the batter-filled cake tin in the preheated pressure cooker and close the lid. Cook for 35 -45 minutes on medium heat. Insert the knife – once it comes out clean, the cake’s ready to serve.
  • Let it cool down to room temperature and remove the cake. Cut it into slices, serve it and enjoy.

If you don’t have an oven at home, you can use your pressure cooker instead by following these steps, or watch this video to get some more detailed instructions.

Making tutti frutti cakes is so easy and fast. You only need to have the ingredients ready and follow all the instructions we’ve given.

Did you learn something new from this article? I really hope you did! Hit like or post your comments below if you have any questions or would like some additional information. Share this article too!

Looking For Tamarind Paste Substitute? Here Are Four Options

It is not surprising that people ask for a tamarind paste substitute, as this ingredient is the Holy Grail for fans of Thai-based recipes. You can also spot this paste in some Mexican and Indian cuisines.

Tamarind paste is derived from the fruit tamarind, which is a small pod with a sour flavor and sticky texture. This fruit is commonly found in many Asian countries, such as Thailand and the Philippines. You can also spot variants of it in areas like Mexico.

You eat this fruit by removing the seeds from the pods. These pods have a dry texture, so it is not necessary to skin them. Instead, just crack them open until the seeds come out. I have to warn you that the seed is very sour. The first time I tasted it, the sourness shriveled my face.

Although eating the fruit is not harmful, you should not consume it raw, as it is extremely sour.

More…

Tamarind Paste Substitutes

What Is Tamarind Paste?

Tamarind paste is just a derivate of the fruit, which has been made into a semi-fluid state so that you can easily use it in your cooking. There’s no special ingredient to it. Usually, this paste comes in a tube or a container and has a very decent lifespan.

The sour taste of tamarind paste doesn’t vary too much, so I always use sweeteners (e.g. sugar and honey) when I use it in my dishes. The sweeteners will counteract the sourness, which gives balance to the overall flavor of the food.

You can generally buy commercial tamarind pastes in any of the Asian and Chinese stores, and some Indian culinary stores will have it too. Of course, there is always the option to purchase it online.

If you can’t find tamarind paste, there are still some good alternatives to it that you can find, as this ingredient is not the only agent that can provide the sour flavour that many dishes require. Check out the next section for the best tamarind paste alternatives.

List Of Tamarind Paste Substitutes

Pomegranate Molasses

For me, pomegranate molasses is the best alternative to tamarind paste. It has a thick and rich texture. The sweetness is still present, but its sourness overpowers it. Many people use pomegranate molasses to provide their dishes with the acidity required.

Technically, pomegranate molasses is a derivate of pomegranate juice. The latter has been processed until it possesses a sticky and palpable texture. This ingredient has a similar effect as tamarind paste, and there is a consistency in its flavor that is pretty essential for any souring element.

Moreover, pomegranate molasses can provide moisture to any cuisine. Therefore, it prevents food from developing a dry, dull texture. It is also notable that this ingredient can give your dish with the same dark coloration that occurs when you use tamarind paste.

If you are going to use pomegranate molasses, you just apply the same amount as you do when you use tamarind paste. Of course, the amount used will depend on the recipe that you are creating.

Citrus Juice

Citrus juice is an obvious tamarind paste alternative, as lime and lemon juices are both good souring ingredients. In many Western cuisines, citrus juice is popular because it provides tartness and acidity. If you compare tamarind paste and citrus juice, the latter is more sour. In contrast, there is a hint of sweetness in tamarind paste.

But despite all this, it is undeniable that citrus juice is a good replacement for tamarind paste. Many Indian chefs will immediately use this ingredient if they don’t have any tamarind paste in their pantries. You will certainly need the blend of sweetness and sourness if you want to explore Thai cuisine. If you don’t want to use too much sugar, then citric juice or a tart juice is your best choice.

Use citrus juice in the same that you would tamarind. Just apply the amount that is required for the dish. If you want to add sugar, divide it with the citrus juice equally. I am sure that you will still get the same effect as tamarind paste.

Mango Powder

Another route you could take is mango powder. This ingredient is a by-product of dried unripe mangoes that are finely powdered.

Tamarind paste is popular in the southern region of India, but mango powder is a favorite of many folks in Northern India. The sourness and acidity of this ingredient is similar to tamarind paste.

These souring ingredients only differ in their dryness. Specifically, mango powder has a drier texture than its counterpart because it is a powder rather than a liquid paste.

Of course, you can still make a paste out of mango powder by adding water to it. I tried this once for my Hot and Sour Thai Soup and found the taste to be as satisfying as tamarind paste.

Vinegar

Perhaps the easiest substitute for a tamarind paste is vinegar. This is a common condiment that you can get from any food market. It provides any dish, such as Pad Thai Chicken, with tartness. The sourness of vinegar is second to none. In fact, some say vinegar is even sourer than any tamarind paste!

If a particular recipe requires one teaspoon of tamarind paste, just replace it with one teaspoon of vinegar. The two  ingredients should have an equal application in any dish. Otherwise, the food will be too sour.

Some Other Alternatives

If you can’t still find any of the ingredients I have mentioned, you can try the fruit Kokum. However, as this fruit is just native to India and its nearby peripheries, you will have trouble finding it. This ingredient has rare cooking applications and is even found in many Westernised Indian and Thai restaurants.

You can use kokum by submerging it into water. After several minutes, you can add it to your dish. But before you do this, make sure that you have already removed its seeds.

Kachri is another powder that you can use as a souring ingredient. It is a local seasoning found in many parts of India. Specifically, this fruit is related to cucumber. When you dry and powder it, kachri can provide a tart and sour taste.

Conclusion

These are the best options for a tamarind paste substitute. Each of them can provide a sour note to any dish and also enhance the flavor of a cuisine by giving it a flavor that your tongue can’t resist.

Of course, I still recommend that you should use tamarind paste when it is available. After all, it has special, unique characteristics that remove the blandness of any dish. But if this paste is not present, then you can try all of the options I have listed here.

Did you learn from this article? If you have any questions, comments, and suggestions, feel free to ask me. I will be waiting!

The Best Potato Starch Substitutes (Hint: It Is Not Potato Flour!)

Finding a potato starch substitute can be easy or difficult, depending on how familiar you are with this ingredient, so there are times when the hunt for an alternative can become an ordeal.

But don’t get discouraged. All problems in the kitchen have their solutions, and you’ll find that some common foodstuffs can often replace an elusive ingredient in your pantry or refrigerator.

Have you remembered the article I wrote about tarragon and garam masala? Many people thought that they couldn’t be substituted, but with a little creativity and intuition, I was able to come up with alternatives to these ingredients. Of course, I had my chef friends to help me out with the brainstorming process!

At this point, it is safe to say that potato starch has several viable replacements. You just need to know how potato starch works in your recipes and see what other ingredients can replicate its effects.

But if you are unsure about searching for them yourself, then allow me to do all the dirty work for you. I have listed below some of the best alternatives for potato starch

More…

What Is Potato Starch?

Before we delve into the main topic, let us discuss this first, as knowing the very nature of potato starch is necessary if you want to know about its alternative.

Potato Starch

Potato starch is just like its names suggests, a starch derived from crushed potatoes. Specifically, the starch that comes from the squeezed cells of the crop. It then undergoes a refining process and eventually becomes a smooth powder.

If the starch has been properly refined, it can provide health benefits, especially for those who follow a gluten-free lifestyle. After all, it has small quantities of fat and protein.

Potato starch can generally be used in a variety of recipes. A lot of people use it as a texture enhancer for their sauces and noodles, and you can also use it in pastries. 

Can You Substitute Potato Flour For Potato Starch?

Just because these two ingredients have “potato” in their names, it does not mean they are interchangeable. Not only are the various components and procedures used in their manufacture different, but their intended purposes are different too.

Potato Flour

As I mentioned earlier, potato starch is very smooth and fine, while potato flour is a heavy type of flour that can give a distinct texture to the food.

Moreover, potato starch has a neutral tang, which is great if you don’t want to overwhelm your food with extra flavor. Whatever the recipe is, potato starch will blend in completely.

In contrast, potato flour retains its strong potato taste, so you should be careful when using this flour in a recipe.

But despite this restriction, you should not worry. After all, there are a myriad of potato starch substitutes that you can use if you are in a rush. If you want to know them, proceed to the next section! 

Potato Starch Substitutes

Fortunately, most potato starch alternatives are widely accessible and can be applied to many different recipes and dishes. Therefore, your options will never be limited.

1. Tapioca Starch

Like potato starch, tapioca is taken from a plant root, called the manioc root. If you live in any Southeast Asian regions, you will know that manioc is known there as cassava. Even the West Indians call this root by the same name.

The process of making tapioca starch is similar to potato starch. First, the root is taken out to be dried. Next, it is pounded heavily until it becomes extremely fine.

Some people call tapioca starch by the name of tapioca flour. These two terms refer to the same ingredient, so do not be confused when you spot these two labels in the market.

Both tapioca starch and potato starch can be a substitute for wheat flour. But if you are going to use a tapioca starch as a replacement for potato starch, always remember that they have different thickening capabilities, and potato starch can make any food thicker compared to tapioca starch.

To solve this problem, you just have to double the amount of tapioca starch that you use. The amount should be in reference to the original amount of potato starch that is required.

Another thing to remember is that, unlike potato starch, tapioca starch is incompatible with acidic fluids. If you mix tapioca starch with them, its thickening prowess is lost. Furthermore, it is not ideal for extensive cooking, so only include it at the end of your cooking procedure

2. Arrowroot

When it comes to thickening purposes, arrowroot is an excellent choice. It is still classified under root starches, and so is pretty similar to tapioca starch and potato starch.

Arrowroot can be derived from a plethora of plant variants, specifically from the Marantaceae family. Interestingly, there are some parts of the world where tapioca is labeled as arrowroot. But always remember that the two have their differences and should not be confused with one another.

Arrowroot starch is created by pounding the roots of the plant so that they are separated. The pulp that you can get from the grinding process is then dried before it is converted into a powder.

Once it becomes a starch, arrowroot tends to be a great food thickener. It also doesn’t break or loosen when it’s exposed to acidic content. You can freely substitute it for potato starch without minding about the amount used. If a particular recipe tells you to use one teaspoon of potato starch, you can replace it with one teaspoon of arrowroot.

You can even use the arrowroot as a replacement for wheat flour. Since it doesn’t contain too much protein, it can serve as a thickener for gluten-free recipes. Cakes and other pastry products can also benefit from this ingredient. 

3. Cornstarch

It is an undeniable fact that cornstarch is a popular food thickener. It is widely available in many parts of the world, and its usability is good for beginners. However, cornstarch should not be your first choice if you are looking for an alternative to potato starch.

Please remember that cornstarch is actually a grain thickener. All of the options that I have listed here, including potato starch, are referred to as root thickeners. But despite this, cornstarch is still a versatile ingredient. It possesses the same neutral flavor as potato starch, which makes it a decent substitute. Its texture is fine and glossy too.

Furthermore, cornstarch can be subjected to high heat for extended periods without ill effects. Most of the starch I have listed here cannot achieve such finesse. The major drawback of this ingredient is its deterrence to acidic liquids. For instance, if you are going to include cornstarch in fillings and sauces (that are usually acidic in nature), the food will not thicken. Instead, it will develop a chalk, bland texture.

For certain particular recipes, you can substitute cornstarch for potato starch by using the same ratio. You don’t have to double or lessen the amount unless you deem it necessary. 

4. Coconut Flour

This is another alternative that you can use for potato starch. It is a grain-free substitute and can be used by anyone who engages in a gluten-free or vegan lifestyle.

Make sure you lessen the amount of the coconut flour by around 15%. It tends to seep out of the liquid contents of the food, which can lead to the alteration of its texture. This typically occurs when you use the flour for baking. If you use too much flour, the mixture will become hard and difficult to work with.

I recommend that you add the coconut flour gradually until you can get the optimal texture you want. Alternatively, you could also increase the amount of liquid to balance out the flour.

Conclusion

There are a variety of potato starch substitutes that you can use, so you should never worry yourself if this particular ingredient has gone missing from your kitchen. As long as the following options that I have listed are present, you can still make your desired cuisine or delicacy.

The best thing about these alternatives is they are easy to find, as they are very accessible, even in your local stores, and they are also inexpensive. Using them won’t be a problem either. Therefore, if you are in a tight spot, you should try any of these ingredients.

Was this article helpful? If you know of some other viable substitutes for potato starch, just drop them in the comment section below!

Cluck This: The Best Chicken Base Substitute Out There

Chicken stock is one of the first things that you learn about when you start culinary school. And rightfully so, as there are a lot of recipes that call for chicken stock. In fact, it is a valued ingredient all around the world. Singapore has chicken rice, America has chicken noodle soup, the Japanese use chicken stock when making ramen, and the Italians use chicken stock in their fabulous risottos.

I have noticed that a lot of people make the mistake of using the term chicken base when they are referring to chicken stock. Even many of my foodie friends do this and confuse chicken stock with chicken base. While it is easy to confuse the two, there are some key differences between the two of them, and if you add the humble chicken bouillon into the equation, there is even more confusion. If you are one of those people, I am going to help you by telling you what separates the three ingredients.

Chicken stock is created by using whole chickens, water, some salt, ground black pepper, garlic, and vegetables, like carrots, onions, and celery. The concoction is then boiled and simmered in a stockpot for hours until you get a clear chicken broth soup (a lot of skimming is involved during this process).

Chicken base undergoes the same process but it’s cooked for longer. The broth is then slowly simmered into a highly concentrated chicken stock. Chicken base can also be bought in stores in a highly concentrated powder form. Typically, the chicken base is darker and thicker than regular chicken stock, while chicken bouillons is bought in cubes that dissolve in boiling water.

As chicken stock is much lighter than chicken base, it is preferred in dishes like chicken noodle soups, risottos, and chowders. While the thicker and richer consistency and taste of the chicken base makes it a perfect to include in stews and sauces.

Personally, I prefer making chicken base, as opposed to chicken stock, because of its rich flavor. I absolutely love making ramen at home, so it is imperative that I know a thing or two about making a great chicken base. I have done this over a hundred times as an ingredient for my chicken rice, chicken and fisherman stew, crab chowder, and even Indian curries.

However, making chicken base will take you hours and hours, so it’s not suitable if you need it for a quick recipe. I have scoured the internet for other ingredients that can be used as a substitute for chicken base and listed them below for you.

More…

Best Chicken Base Substitutes

The Best Chicken Base Substitutes Out There

1. Thank God For Chicken Bouillon

Chicken bouillon, while not the healthiest option, is the quickest substitute for chicken base. This intense flavor packed cube can replicate a stock soup that normally takes an hour to make in just a matter of minutes. To make the broth, simply fill a stockpot of water and bring it to the boil. Then take out your chicken cubes and dunk them into the stockpot. Remember that the ratio of water to chicken cubes depends on how many cups of chicken base you need. So if your recipe calls for four cups, just add four chicken bouillon cubes to four cups of boiling water.

Using a whisk, mix the broth with the boiling water until it is all dissolved. Once this is done, bring the heat down to medium and simmer for a few minutes. Then add another bouillon to get that intense chicken base flavor.

  • Pro Tip: Don’t add any salt when using bouillon to create stock. Most bouillon cubes already have a high sodium content so adding more salt can make it too salty. Don’t forget to taste the broth to check that you are happy with the taste.

2. Let’s Go Green (Sort Off)

Vegetable bouillon is another substitute if you don’t have any chicken broth cubes in the kitchen. While it won’t impart the taste of chicken, it does a good job of mimicking the saltiness and flavor of the chicken base. However, I will let you in on a secret; use some roasted vegetable bouillon instead of the regular variety, and it will mimic the meaty taste of chicken.

To make the broth, just follow the same steps, just as you did in the previous item on the list. One significant benefit of using roasted vegetable bouillon is that it is a good alternative for vegetarians. While this doesn’t replace a good old-fashioned chicken base, it is much quicker to do and might even be the healthier option if you go with the low sodium variety.

3. Uhmm, Soy Sauce?

Okay, this is one of those emergency situations where you really need to make a chicken base and all the other options are not available. While I have yet to try this option, some people have said they tried masking the lack of flavor of chickenless broth by adding some soy sauce.

The logic behind it is that the thick, rich flavor of the soy sauce can mimic the saltiness of the chicken base. Using the same process as above, substitute one teaspoon of soy sauce with every cup of water that you need. Taste the soy sauce broth during the entire process, and add salt if you still think it is needed.

However, please keep in mind that this is strictly an emergency substitution.

4. A Bit Of Wine

Consider using white wine if you are really out of options and need to make some chicken base. You just use half a cup of white wine with half a cup of water and you are good to go. Keep in mind that this will make your broth less salty so you might want to add a bit of salt to the mixture.

Sherry is another type of wine that you can use in this recipe. But be aware that this will give it a taste of alcohol, so don’t serve it to those who are sensitive to alcohol.

5. Moo Is Still Good

If beef bouillon is all you have, then do not despair. Beef broth is still a worthy substitute if you really lack the other ingredients. Just follow the water to cube ratio in our instructions and you should be fine.

Broth Your Way To A Good Dinner!

Chicken base is a fantastic and very versatile ingredient to have around the house, as there are a lot of things you can do with it. However, cooking it is a different animal. It can take hours to finish it. While there is no substitute for a rich chicken base that has been simmering for a long time, it still pays to know what other ingredients you can use that come close to the real thing.

I adore making this kind of list. Cooking is not an easy hobby or profession, and there are a million tired moms and single dads who tire themselves out day in and day out just to put food on the table. So, if I can help them out by making their jobs easier, I absolutely jump at the chance.

If you loved our article today, then feel free to share it with anyone who might be interested. If you have any stories about the chicken base substitute, then it would be great to hear about them. Please tell me your stories in the space below. Keep on cooking and eating!